Sensors configuration
Sensors dashboard
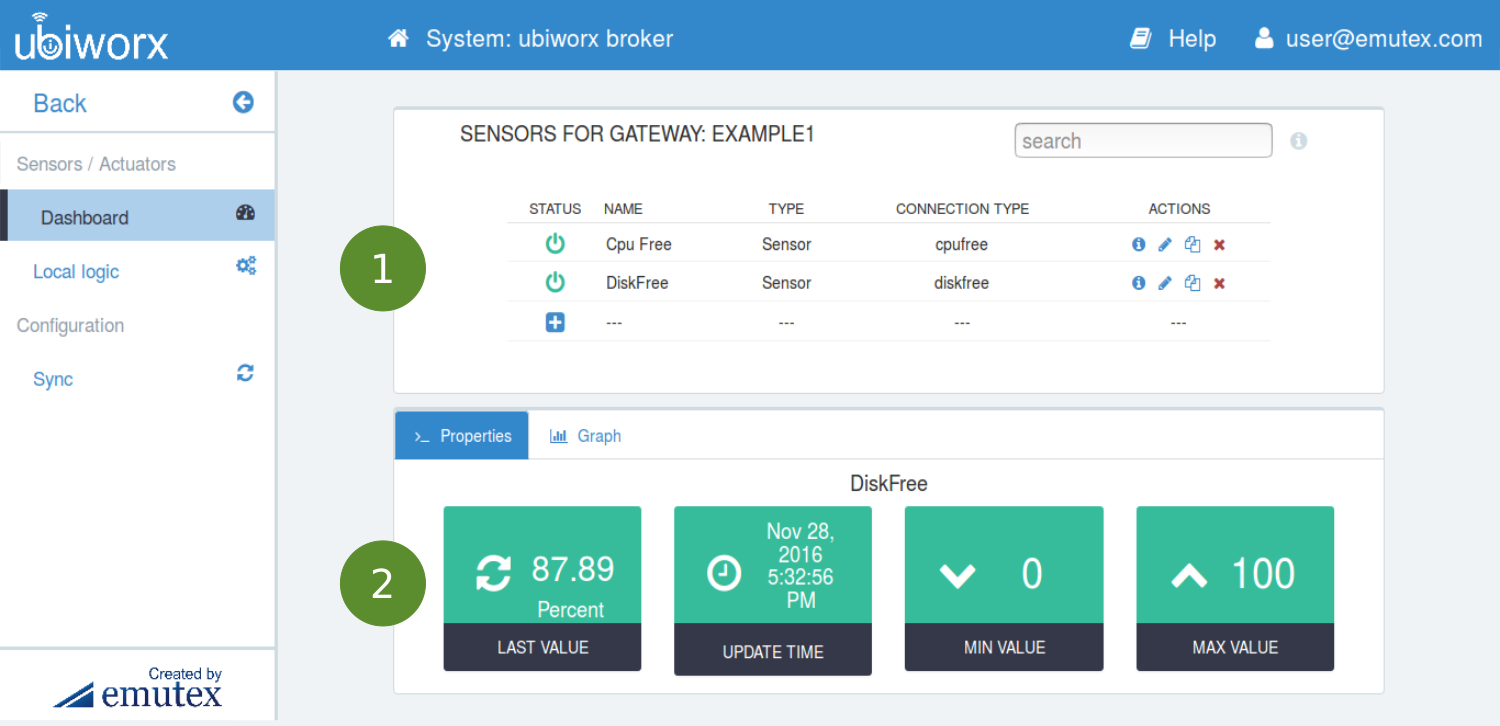
The sensors dashboard provides the user with a center point where they can view and control the connected sensors and actuators.
Some of the features that this view offer are:
- Information about the currently connected sensors/actuators.
- A graph with data for each sensor/actuators.
- A sensor/actuators property section.
To get to this view:
- Go to the ubiworx broker dashboard (https://broker.ubiworx.com)
- Click on the gateway the sensor are connected to.
The sensors view
The view contains 2 main sections:
- The top panel with information about the sensors and actuators.
- The bottom panel with 2 navigation tabs:
- The data tab displays a graph with information about a sensor.
- The properties tab displays control options for a sensor or actuator.
Note
Clicking on the names in the top panel will load information about that sensor or actuator in the panel below. Depending on the currently selected tab (Graph or Properties) the appropriate information will be displayed.
sensors dashboard
The graph tab
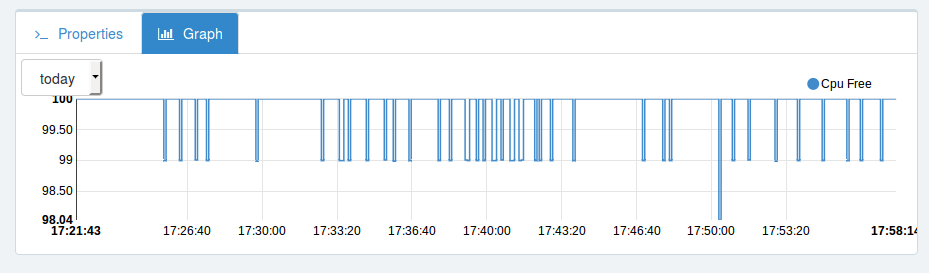
sensors graph
The Graph tab provides users with a quick visualization of the data reported by a sensor. Users can select from three types of time spans:
- Day
- Week
- All
The control tab
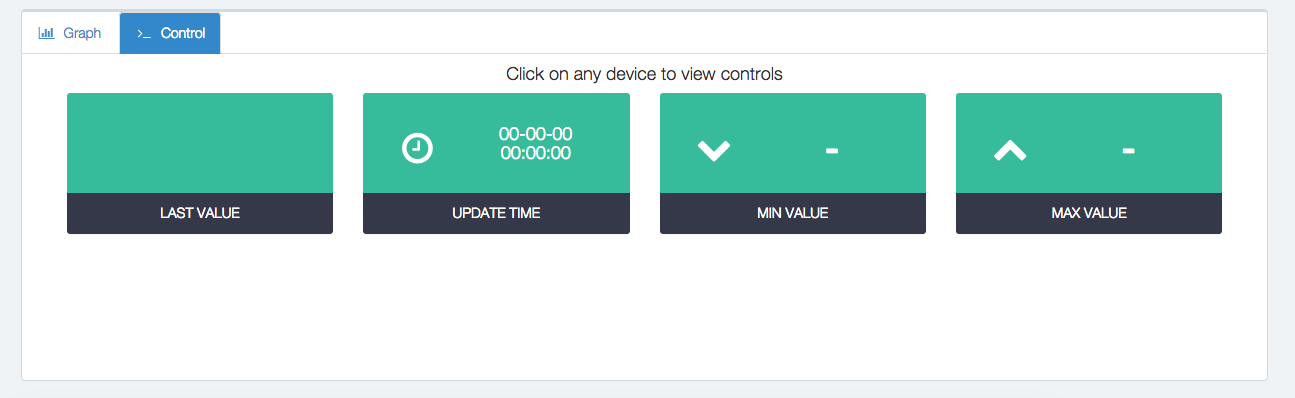
sensor control panel
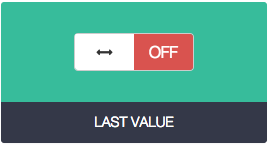
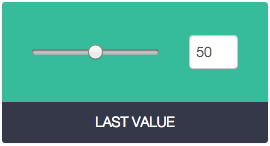
The control tab allows users to get live values for sensors or actuators and set live values for actuators. The information that gets loaded in the LAST VALUE box depends on the type of sensor/actuator selected. See below for details.
There are 3 separate control options depending on the type of device selected in the view above:
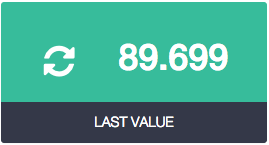
- Sensor live value - the instant value for that sensor with the option to refresh the value.
- Actuator switch - a switch with the current sate of the actuator and the ability to set the value of the actuator.
- Actuator slider - a slider with the current value and the ability to set the actuator to any value in the range by sliding the bar or typing the value in the field.
| Sensor live value | Actuator switch | Actuator slider |
|---|---|---|
 |
 |
 |
Add a new sensor or actuator
Adding a new sensor or actuator to the system is as easy as filling in a form. Once the correct details are provided the sensor will start reporting data to the ubiworx broker.
The ubiworx IoT framework allows users the ability to declare 2 types of sensors/actuators:
- Physical sensors/actuators to monitor and control devices, like LED, GPIO or accelerometer.
- Virtual sensors/actuators like free memory, core temperature and wifi signal.
These are the steps for creating a new sensor:
Go to the ubiworx broker dashboard (https://broker.ubiworx.com)
From the gateways list that will appear, click on the gateway that owns the sensor you want to update.
Click the Add button on the bottom of the sensor table (see image below)

Note
For more information about available sensors and actuators go to this apendix.
- Select the sensor that you want to add and fill in all the sensor parameters. Details about each sensor are provided here.
- Click on Save & Sync button to apply changes and synchronize immediately with the gateway
Warning
Keep attention on assigning sensor Unique ID parameter because it cannot be changed afterwards
Note
For more information about sensor general parameters go to this apendix.
Edit sensor
Editing sensors is a feature most often used after cloning a sensor or when the user wants to adjust some values like scale and offset.
Go to the ubiworx broker dashboard https://broker.ubiworx.com
From the gateways list that will appear, click on the gateway that owns the sensor you want to update.
Select the sensor you want to modify and click the Edit button aside (see image below).

Edit the parameters that you want to modify. Details about each field are provided here.
Click on Save & Sync button to apply changes and synchronize immediately with the gateway
Clone sensor
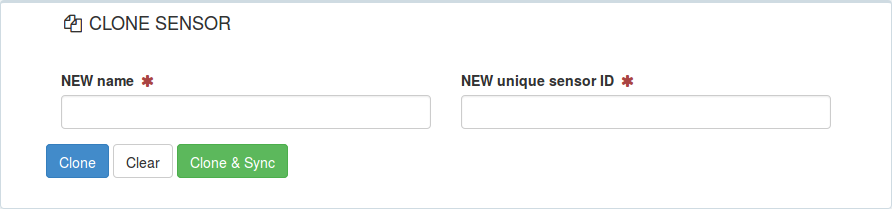
Form for cloning sensors
Cloning a sensor allows the user to quickly add a number of sensors of the same type.
- Go to the ubiworx broker dashboard https://broker.ubiworx.com
- From the gateways list that will appear, click on the gateway that you want to add the sensor.
- Select the sensor you want to modify and click the Clone button aside (see image below).

- Give the cloned sensor a new name and a new id.
- Click on Clone & Sync button to apply changes and synchronize immediately with the gateway
Sync sensors
The sync functionality is added to allow users the possibility to make changes to a gateways configuration, add, update and clone sensors and only sync the changes at the end of the setup process.
The sync button is always available on the left toolbar and allow you to be sure that all the modification that you have done to your sensors are sent back to the gateway.